Showing posts with label Photography. Show all posts

Tuesday, August 19, 2014

ECSC - Preparation and Gear List

Finally the day is here. Shooting with ECSC360 is the most anticipated week of the year of me. It is one of long days starting at 4:30 a.m. and often not ending until sometime after midnight. It is filled with the tension of having to get the shot and having it ready for publication by the media deadline. While the public is enjoying the largest beach party of the year, our focus is on the details like f-stops, compositions, and shutter speeds. Our eyes are constantly scanning for the next captivating image. The crowds cheer as a surfer blasts a 360 air while we pray that we didn't miss it - that we nailed the focus and captured the moment. Did the spray obscure the expression? Was the composition clean or was there something missed? Will it translate to a still?

2013 East Coast Surfing Championships

I spent last evening cleaning my cameras and lenses until each was like new. Shooting on the beach we have to constantly fight sand and salt spray, so the cleaning will be a repetitive theme throughout the week. Today while waiting on the delivery of a Nikon 200-400mm f/4, I am packing my gear. I will take with me:


  • Nikon D800
  • Nikon D300s
  • Nikon 200-400mm f/4
  • Nikon 70 - 200mm f/2.8
  • Nikon 24-70mm f/2.8
  • Tokina 16-28mm f2.8
  • (2) Induro tripods
  • (2) Induro BH ball heads
  • (1) Wimberly head
  • ThinkTank Hydrophobia 70-200mm rain cover
  • Op-Tek backup rain covers
  • Hoodman Loop
  • Lee filter system with holders and hoods
  • Lee ND soft graduated filters
  • Tiffen polarizer
  • Lee 10-stop ND filters
  • Tiffen .3, .6, and .9 ND filters
  • Cable release
  • Camranger remote release
  • Batteries and chargers
  • Compact flash and SD cards
  • Nikon 900 strobe
  • Strobe gels
  • Rocket blower
  • Microfiber cloths
  • Residual oil remover lens cleaner
  • LensPen
  • ThinkTank Streetwalker camera backpack
  • LowePro AW200 camera backpack
  • Non-abrasive PecPads
  • Sensor Scope
  • 15" Apple MacBook Pro
  • (2) Seagate portable 1TB backup drives
  • Apple iPad
  • Apple iPhone 5s
  • Pocket battery charger with USB connect
  • Intuous 4 tablet and stylus
  • Spyder 4 Colorimeter
  • Memory card readers
  • Gaffer tape
  • Headlamp
  • Heat sheets


2013 East Coast Surfing Championships

Virtually everything listed above will be used over the next 5-days. So now just pray for surf. It killed me watching the opening round of the Billabong Pro in Tahiti yesterday with 12' faces. We may not have triple-overhead surf for this year's event; however, we will have a great event to cover.

Tuesday, August 12, 2014

2014 ECSC - Old is New Again

7-days until I'll be heading back home to shoot the East Coast Surfing Championships with the ECSC360 crew. I love photographing surfing. It encompasses everything that I enjoy seeing through the lens of a camera - seascapes, action, beauty, people, and emotion. My first foray into surf photography was back in the 80's when Tony Bailey asked me to come down and shoot with him during an ECSC event. Sometimes I wish I had taken a queue from Aaron Chang and followed a dream of traveling to the world's most incredible surf breaks and photographing the sport's most talented athletes. Fear of the unknown left me lost in the safety net of a boring but steady office job only to occasionally ponder what might have been.

2014 East Coast Surfing Championships

Of course things were much more difficult then. The advent of continuos auto-focus (AI servo mode) and digital cameras revolutionized photography in all sports, especially surfing. Shooting wide-open left little margin for error when focusing on a fast moving surfer carving the face of a pitching wave. Manually focusing a long telephoto on an erratically moving high-speed object was not an easy task. We learned to practice predictive focusing based on both photography and personal surfing experience. The shape of a wave and speed of a wave coupled with the knowledge of the surfer's style enabled us to predict where the next big move would occur and react accordingly. I can only imagine how many hours of shooting that the likes of Don King, Chris Klopf, Jeff Divine, and Warren Bolster put in to develop the vision and split second reactions to capture the amazing images that they did.

2014 East Coast Surfing Championships

Unless you had a bulk film back, you were limited to 36-exposure max per roll. Nowadays it is not surprising to hear that a photographer fired off 36-frames on a single wave. During the first ECSC that I shot in the digital age, I logged close to 2500 photos in a single day. That would equate to 70 rolls of film. A roll of Kodak Elite Color costs approximate $3.00 and processing was another $8.00. 70 rolls would cost $770. Over 5-days, the cost would reach close to $4000. During my youth, I couldn't afford enough film to make it through a week-long contest.

2014 East Coast Surfing Championships

There is still a cost today although it is measured more in time and space as opposed to raw materials. As image files get bigger, the corresponding length of time to download and edit them increases. Likewise, multiple copies of the images must be stored on primary and secondary hard drives and offline storage sites. Add to that the catalog management software to be able to organize and retrieve the images plus the editing software to "develop" the images. From an equipment standpoint, cameras can only handle so many shutter actuations before needing replacement. On average most shutters last 100,000 actuations. It sounds like a lot until you realize that it is easy to shoot 10,000 photos in a week! You quickly realize it is not cheap by any means.

2014 East Coast Surfing Championships

This has led me to taking an old approach to shooting with modern gear. I have returned to the roots of the 36-exposure roll and predictive shooting. Instead of simply firing continually with every drop in, limit exposures to the critical point of action. Over the course of a contest or contests, you learn the styles of the individual surfers. You can determine which moves they are likely to perform based on their style and the wave type. Over the course of a normal day now, I will shoot a couple hundred images. I only need a handful for the news outlets and a few additional for my own portfolio. The key is that each time I depress the shutter button, it is at a decisive moment that will make for an intriguing story-telling image. Channeling the greats from my youth has drastically improved my current approach - better quality, faster delivery, and more efficient expense management.

Follow me on Twitter @TravisOwney or on Facebook.

Friday, October 5, 2012

Chasing Light

It seems lately that I have mainly been shooting or assisting with portrait sessions. While I love my clients and photographing people, it is nice to take a break every now and then to create fine art landscapes. There is something about being alone in a dark, deserted location with only a camera, tripod, and your thoughts that is somewhat cathartic to the crazy hustle and bustle of everyday life. With the Stockley Gardens Fall Art Festival coming up in a few weeks, I took a weekend off and headed to the Outer Banks to find a few more images for the show.


I left late Friday afternoon with no real destination, no hotel reservations, or concrete plans. I just started driving while keeping an eye out for great light. It is not often that you get the opportunity to just let the light dictate where you will land. Client shoots are generally timeboxed and though you try to schedule when the best light is available, you usually find yourself having to attempt to mold whatever conditions are present to get a good image. It is anything but natural - reflectors, strobes, assistants, dreadfully boring skies, gale force winds, etc. leading to more mechanical photography. It is a fun challenge to overcome but it is work. The benefit is that when executed correctly, the images are incredibly satisfying; however, the effort involved is sometimes draining.

Being able to hit the unknown road and leaving it up to it mother nature to drive the scene is refreshing. You just let your mind explore whatever is presented to you. Sure there are technical details that you need to consider when you actually setup the photo but for the most part you are the passenger on a delightful journey. When I arrived in Nags Head, the sun was still fairly high over the horizon. I kept driving, passing the hotel where I usually stay when in the OBX. I found myself wondering past Oregon Inlet and over the Bonner Bridge. My initial intentions where actually to go north up to Duck; however, the light kept pulling me further south. Just north of Salvo I stopped at the refuge visitor's center drawn by a thin strip of clouds stretching across the sound. The light changed dramatically, bathing the marsh in a brilliant golden glow. It only lasted for a few minutes before fading to darkness but a few clicks of the shutter captured its brilliance forever. It would have been entirely missed had I forced a location.


Because I was already halfway to Buxton, I figured I would continue heading south. This is the nice thing about being free to travel randomly. Would there be a room available when I got there? I didn't know nor did I really care. If there wasn't I'd either head back north or sleep a few hours in my truck. Luckily the Island Inn had rooms and as a bonus, they were running a special discount for drop-ins. While walking back to my room after grabbing a quick bite at Diamond Shoals Restaurant (one of my favorites!!!), I noticed the glowing light of the 3/4 moon radiating through the clouds. I looked at the direction and immediately thought of the lighthouse. It is funny that the Cape Hatteras Light has always been one of my most desired subjects yet every time I have been in the area, the conditions never materialized for a really good photo of it; either the light was wrong or the sky lacked the drama needed for something different than every other shot taken of it. Back when it was located closer to shoreline, the ocean provided a great backdrop but in its current location, it is difficult to capture esthetically. Standing in that parking lot, it hit me that I had an opportunity for which I have been waiting for years.

I raced back to the hotel room, grabbed my camera bag and a flashlight. Passing several deer on the entrance road to the light, I pulled into a very dark, very deserted parking lot. The only light was that from the moon itself and the only sound was that of the waves crashing on the other side of dunes. The moon's trajectory was perfect. As it descended toward the horizon, it was moving on a path that would intersect the lighthouse at its midpoint. Most people do not realize how fast the moon, or any of the celestial bodies, move or, technically, how fast the Earth spins. There is not a lot of time to setup and get the capture right before the image is gone. This is especially challenging in the dark. I set the camera up for a portrait composition. The exposure and focus were set for the moon, the brightest part of the scene. A second longer exposure was taken as well. Later in Photoshop I merged the two to bring out some detail in the lighthouse without blowing out the moon. That all belongs to the technical side. The real message is that I ended up here by simply following the light that was available, a glow from the heavens as seen from a nondescript parking lot. The result was an image of the famed Hatteras Light that I have never seen anywhere else.


Another oddity about adventures like this is that the normal concept of sleep and time seem to naturally shift. Although I tend not to sleep a lot, I am horrible when I am at home at getting up early enough to make the drive down to the oceanfront for a good sunrise shoot. On the road, though, is a different story. I returned to my hotel room around midnight and was easily back up at 4:00 a.m.  With the moon long having set, the beach was beyond dark. Having scouted the location before, I knew the basic area where I wanted to shoot. Care has to taken when setting up because it is hard to judge how far water will push in on a large breaking wave. I set up my outfit on the edge of the highest watermark I could determine but always kept one hand ready to grab the tripod in the event that I heard a loud rush of water pouring toward me.


What seems like total darkness is never total darkness. There is always light even when undetectable to the eye. This is my favorite time to shoot. There are a lot of technical fundamentals combined with an equal amount of guesswork. Because exposures can range from 10 - 30 minutes or even longer, you only get so many tries before you have to plan a return trip. The good thing is that using modern technology like the Photographer's Ephemeris application, you know where the sun will be rising. This is also the spot where there will be the most light leakage on the horizon. By making a long exposure, your camera sensor collects the available light and some amazing colors that you will never see by eye. What is black to you renders in burst of yellows, greens, and magentas when recorded. The water turns ethereal as waves repeatedly wash over the beach. It is an incredible experience to stand in darkness and look down at an LCD image that looks unworldly. Again, it is all about the light and its location, intensity, and quality. I could have tried something similar elsewhere on the island and came up with nothing worth viewing.


I hung around a little while to get the classic sunrise shot before packing up to drive north to shoot some photos of the Eastern Surfing Association Championships finals. The wonderful thing about trips like this is that you seldom really know what you got until you get home and see them on your monitor.  So take weekend and set off on your own unplanned adventure just following the light and see what you end up capturing. I think that you will find that you end up with something amazing. Happy adventures...

Thursday, April 12, 2012

EBSC Meet the Artist Party Announced

On April 29 from 4:00 - 8:00 p.m., Jim and Sharon at East Beach Sandwich Company will be hosting a "Meet the Artist" party to wrap up my exhibit. There will be food and beer discounts in addition to Beach Brewery being on hand to provide samples of some of their latest creations. Come on out to partake in the festivities or just stop by to say hi. I guarantee that you will love their food. Chef Jeff is awesome in the culinary department! There will be a give-away or two and simply a fun afternoon. They are located at 4500 Pretty Lake Ave in the...you guessed it... East Beach section of Norfolk. I look forward to seeing you there!

Monday, April 18, 2011

A Tale of 2 Hotels


This past weekend, Liz and I took a weekend respite from our hectic work schedules to get away for a couple of days in the VA mountains. Liz had purchased a one night stay at the Homestead, a plush resort in Hot Springs. The small sleepy town is famous for a few things - the multitude of warm mineral rich springs, the home of legendary golfer Sam Snead, and of course, the Homestead itself. To extend the weekend, we decided to drive up on Friday evening and stay over in Lexington, home to VMI and the College of Washington and Lee. The original plan was to explore Lexington on Saturday morning and then head up to the resort that afternoon. It turned out being an experience in social spectrums and as plans go, ours changed on the fly.

The Ugly Truth - William Shatner Isn't Always Right
This will be crushing news to any Star Trek fans, or even those that look back favorably at TJ Hooker, Captain Kirk isn't the best source of travel planning. In order to save a few bucks, we booked our hotel stay in Lexington through Priceline, a website that I have used often in the past to make travel arrangements. This time; however, we decided to try the "name your price" service and leave it to the captain of the enterprise to find us boarding. The result was a night spent in a HoJo that may have possibly been last updated when many young geeks in the making were still excited about a new episode of the original Star Trek airing.

The lobby was furnished with 70's era couched and coffee table. Sadly, it was more modern than the room in which we were about to spend the night. The stench upon opening the door was the first sign that the evening would be mildly uncomfortable. It caused me to check under the beds to see if there was possibly a decomposing corpse left behind by the last occupant. The single light illuminating the room was sickly issuing from a broken shaded ceiling lamp. Thankfully there was nothing scurrying about the room. An 80's era television and dorm room fridge were the extent of luxury items. We had to laugh at the thought that the room was eerily similar to one you would find in a low budget teen slasher film. It really brought it all together when I heard Liz in the bathroom acting as a plumber and fixing the broken toilet.

The one amenity the hotel boasted was the on-site miniature golf course just outside of our sliding glass door. The photo below is of it in all of it's majesty. I don't think Sam Snead built his golf legend start here. The funny thing is that we were in the heart of the most beautiful country in VA and this was the BEST view that we had! I'd be willing to bet that the 18th hole isn't officially sponsored by NASA.


For a change of scenery, we drove into Lexington for dinner. This was a much anticipated moment because I was going to get to enjoy the best bowl of French Onion soup known to have been created in the states. For those that went to school in the western part of VA, or like me had a sister that went to Radford, you probably already have figured out that I'm talking about Macado's. It has been almost 20 years since I last tasted a rich, cheese covered bowl of heaven. I think I started salivating before leaving VB. Well kids, I'm sad to report that they changed the recipe. There must be a cheese shortage! The only cheese was on a piece of french bread that was provided with the soup. It was still tasty but...why Macado's, why?

Ugliness, Part 2
For the second stage of our trip, I can't blame Shatner; however, Mother Nature is at fault. When we woke (well, I'm not really sure we ever truly fell asleep) Saturday morning, we decided to scrap our tour of Lexington in order to try to beat the massive storms that were moving in from the west. As those of you in VA and NC know, the storm system resulted in numerous tornados that devastated much of eastern NC and VA, costing several people their lives and many others their homes. Homestead was an hour drive up through narrow mountain roads from Lexington. For us it made winding up the mountainside in near zero visibility being buffered by 30-knot winds somewhat of an adventure.

In hindsight, I wished I had stopped to capture the massive rapids of the flooding river but getting the camera gear out in the driving rain didn't seem like a great idea at the time. When we pulled into the Homestead, we were greeted by menacing skies. For a moment, the massive building juxtaposed against the stormy skies conjured up images of the Shining. It was oddly beautiful and scary at the same time.


Between the breaks in the rain, I managed to get out to shoot a few photographs as the storm passed through. It is hard to do something like this justice. Standing there it looked even wilder and more menacing.


The Beautiful - Living the Life of the Privileged
OK, I'll be first to admit that I am probably more comfortable in a beach bar with sand covered floors, but there is something to be said for experiencing a place like the Homestead. Im kicking myself for not taking more architecture shots of the interior but truth be told, we were so busy trying to fit in everything we could within 24-hours, I didn't get the time to spend behind the lens. Maybe one day I'll be able to afford to spend several days there but for now the handful of exterior shots will have to do.

We arrived on at 11:00 and the staff graciously let us check-in early. While not extravagantly big, our room was very nice in every detail. I may be a simpleton, but I really dug the idea that the closet light came on automatically when you opened the closet door. It is the small things that keep me happy.

The hotel, itself, is an architectural masterpiece, sprawling over several city blocks. I had to leave a trail of breadcrumbs to stop getting lost. Everything is big! The grand hall when you enter leaves you breathless and that carries throughout the rest of the building. We swam in the indoor pool fed from the mineral springs, lunched in the casino overlooking the golf course, had afternoon tea in the grand hall, dined at Sam Snead's Tavern, had cocktails in the President's Room, explored the Garden Hall at night, and even crashed a wedding reception after party in the Player's Club.

The next morning after breakfast in the main ballroom, Liz headed off to go horseback riding and I ventured around the gardens to photograph the building in the clearing morning.


The following view of the Magnesia Spring just one of the thousands of romantic vistas the Homestead affords. "Afford" in this case is relative. ;-)


I wrapped up the morning with a 28-frame pano from below the main building before we packed it in to head home. Personally, I still prefer to vacation at a location with sand and surf; however, it is nice to have a change every once in awhile even if it does mean occasionally having to wear a blazer for breakfast. If you get the opportunity, it is a nice escape.

Tuesday, February 24, 2009

Playing with Self Portraits

So what do you do when you can't find someone to model for you, it is too nasty out to go searching for an image, and you've been suffering from a lack of creativity? Try shooting some self portraits. Seriously, I'm not kidding. SPs are a good way to practice your portrait lighting and allow you to experiment on shots without worrying about ruining a client's session.


This past weekend, I dug through the closet and found an old bedsheet with a funky, colorful design to use as backdrop. The basic setup that I used was:


- Alien Bee 800 with a large softbox to camera right
- 72" silver reflector to camera left
- Vivitar 285HV aimed at the background
- Cheap Cactus wireless triggers for both strobes
- Background sheet sandwich clipped to two 8' lightstands
- Bogen tripod
- Nikon D300
- Nikon 50mm f1.8


The focus of this session was to shoot some high-keyish type photos. I decided to break the rule on not clipping highlights and just let the light overpower the shots. Afterwards, I processed the images in Adobe Lightroom and Photoshop CS3, playing with different presets, adjustments, and filters. What I came up with was something different and fun, turning a rainy gray day into a successful shoot. Here are a couple of the results.


The first is possibly one of my favorite portraits taken of me. It looked decent in color but converting it to b/w and then adding a coffee colored tint really defined the image. What I like most about this is the sharpness and catchlights in the eyes.


One question that I routinely see posted on forums is "how do set the focus to get a sharp image?" I forget where I saw this tip initially but I definitely cannot take credit for it, someone much smarter than me discovered it. Setup the shot and then remove your camera from the tripod, walk over to where you will be standing, and turn the camera back to the tripod, setting the focus on the tripod itself. Important: if you are using autofocus, turn it off now; else, when you set the camera back on the tripod and go to trip your shutter, the camera will refocus. The beauty of this is that it is simple and accurate. There is no need to guess distances, break out tape measures, or set up a "focus dummy" in your spot.


The next image was really fun. Unlike the previous one, I really wanted the colors and light to jump off of the screen. The one thing that I didn't care about was blowing the highlights. I turned up the AB800 and opened the lens to let in more than enough light. In LR, I dropped the clarity a little so that the whites gained a glow. I also increased the Black slider which added definition to the eyes. While this image probably isn't the best for me personally, I can see this effect really working great for funky portraits of kids and seniors.


The last image was a bit darker (my mood when I shot this was down a bit having been locked inside by a steady drizzle all day!) The image was quite what I was initially after but it did get its origin from a night when I was sitting on the catch watching a late night movie. Just outside of my living room is a neighborhood light that was was casting these cool shadows through my french door. My initial thought was to shoot it with just the existing light streaming in, casting the soft shadow across my face. I wanted a cool white balance andmaybe even a conversion in LR to a blue monochrome finish for a colder yet romantic feel. That was the plan. Here's what really happened.....


Somewhere along the line I thought that I could "help" the ambient along by placing a single wireless 285HV outside to camera left, aimed back through the French door. My initial test shots showed that even at the lowest setting, the light was being thrown much harder than the lightpost. The more I looked at it, the more I was intrigued with what I was getting. The mood of the shot changed entirely. I grabbed the 72" silver reflector to add a bit of fill to camera right.


In LR, I converted the image to b/w and used the exposure brush to selectively darken/lighten a few spots. I then added a heavy vignette. The image isn't one that I would use for an everyday portrait but it was fun creating something with a darker feel.

Self portraits are great as creative outlets and for general practice. If the results are a disaster, you simply delete and no one is the wiser; however, if you hit on something that you really like, it can be a great addition to your next client shoot.

Wednesday, January 28, 2009

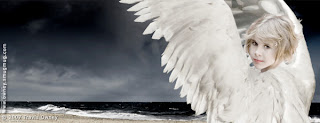
The Creation of Ariel

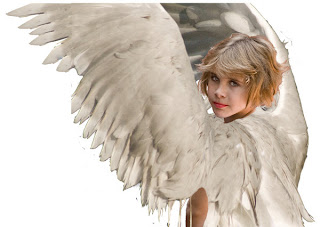
I recently received a request on DGrin for information on how I created an image of an angel. Btw, the angel is my niece Savannah and she truly is an angel! The Ariel image was created for the LPS Challenge: Sin or Virtue last year. Here is the final....


When I envisioned it originally, I planned to purchase or rent wings from a theatrical store for my niece Savannah to wear. Well I couldn't find any for rent and to purchase a set online, it was going to cost at a minimum $600, which was way more than I was willing to splurge for a contest. Next I investigated making a set of wings only to find that Michael's had 3 feathers for $5, another small fortune. I decided to take a different tact and employ some editing skills. The key was that all of the images had to be taken that weekend so I didn't have a lot of time to set up perfect shots.

Element 1: Stormy Beach
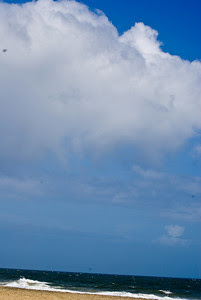
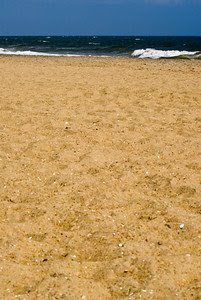
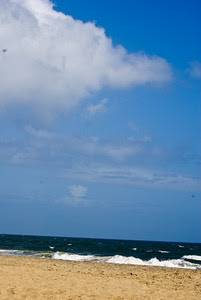
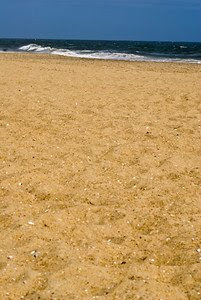
This part was going to be easy. It just so happened that their was tropical storm passing by Virginia Beach that weekend. As usual, though, it was not as easy as planned! When I got to Sandbridge Beach, I opened my bag to find that condensation had formed inside of my 18 - 200mm lens (I was using Sony at the time). The only other lens I had was a 70 - 300mm, leaving me the choice of either giving up on the landscape or set the lens to 70mm and shoot a panaroma. To get enough usable field for the depth I wanted, I set the camera in portrait orientation and took 8 frames.. 4 top and 4 bottom. Here are a few to get the idea....

Frame 1:

Frame 2:

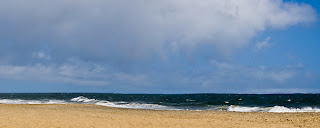
When I got home, I stitched these using PS CS3 and trimmed the panaroma into a 2:5 ratio to get the following image.
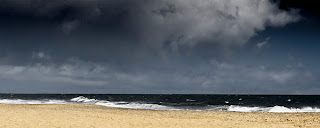
As you can see, the tropical storm was a bit of a disappointment as the the clouds never formed into the dark, nasty formations that you expect from a storm like that. To fix it, I created a black and white layer above the color base. I then added multiple curves adjustment layers and gradient masks to enhance the contrast of the sky and beach separately. The next step was to copy the original background layer to the top of the stack, set its blend mode to "Color" and then drop the opacity until I got the tone that I needed.


Element 2: The Model
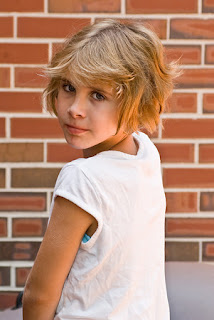
Due to time constraints, I wasn't able to take Savannah to the beach for the shot. I had to settle for getting a shot of her at her house on my way home from the beach. Now this is possibly one of the worst portraits -- I take that back -- this is not even a portrait by anyone's standards. It is a 5-second snapshot in bad light with a horrible background.


In PS CS3, I extracted Savannah from the background. It was a fairly frustrating extraction due to the mortar in the bricks matching her hair. This was probably the most pain staking part but when I was done, the patio was gone.

Element 3: Wings
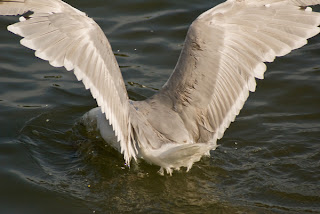
This part was fun. I grabbed my camera and headed down the local marina and hung out by the fish cleaning station for a bit. Before long, a group of fishermen showed with a nice catch and began carving away. Within seconds, there was no less than 50 seagulls hovering around picking off scraps. I must have shot 200 images and I'm not sure if this is the exact one I settled on but it was close...


Element 4: An Angel is Born
In PS CS3, I opened the image of Savannah and the seagull photo. Using the Move Tool, I dragged the wings image onto the Savannah image, creating 2 layers with the wings on top. Selecting the Wings layer, I dropped the opacity to 50% so that I could see Savannah beneath them. I selected Edit>Transform and rotated the wings so that they were pointing more vertical and moved them so that they lined up with Savannah's body. I also tweaked the image size to make the wings "fit".


Once I had the wings in the location that I wanted, the next step was to create a mask on the wings layer and begin painting out the portions of seagull and that I did not want. Paint on the mask with black to hide the unwanted elements and let the background show thru. I then raised the wings layer's opacity back to 100% and I had the rough angel image that I needed.

As you can see, the image is really rough (Also pretend that the white background is really transparent). I used the Healing Brush to smooth out the intersection of feathers to Savannah's body as well as hide her arm by adding feathers. I also cleaned up the mask a bit more to hide the extraneous stuff I missed the first time around.

The final adjustment to the Angel was to desaturate her facial color. If you recall from above, her portrait was taken with hard sunlight bounced off of a brick wall and her face picked up a lot of red. I lowered the saturation and selectively brought back color to the eyes and mouth by masking the Saturation Adjustment layer. I added some surface blur to her face as well to give her that soft powdery appearance.

The last step in the process was to drag the Angel layers into the Beach image and make some final healing and color adjustments to each element to get them to blend seamlessly while adjusting a final curves layer to add depth.

I wrote this from memory of something that I did a year ago so I probably missed a few things but I think you will get the general gist. The key is envisioning your target image and then seeing how different components can be molded to fit. On their own, each of these photos were less than good; however, bringing them together created something kind of magical. I wish I was this creative all of the time.

Friday, November 14, 2008

Lynchburg Soccer Game - Lessons in Sports Shooting

Sunday afternoon Skyler had her last soccer game of the year and I was excited to be there to see it. Not only is Skyler on the team but the team is coached by her father, my brother-in-law Jake. I figured this was a good time to break out the Bigma and practice my sports shooting. A little known piece of history is that back in 1991, I made my first venture into photography sales shooting little league football. That was back in the film days and after this weekend, I'm surprised that I got any images back then that were reasonably good!


I forgot how difficult it was to follow the action, adjust for changing light, and attain sharp focus on the spur of the moment. The latter may have actually been easier back then because we had trained ourselves to manually focus lightening quick. The autofocus, at least on the Bigma, doesn't react that fast (although it is still impressive for the type of lens). If I had a split screen, I may have switched to manual but since I didn't, I decided to stick with the auto.


The next issue is focus hunting in continuous mode. While linear or solo sports are fairly easy to get a lock on and track, a bunch of 7-year old girls wearing like colors and running in a pack causes the focus to jump from person to person. I switched over to selective focus for a good portion of the shoot knowing that I was going to miss a few shots because the focus took to long to lock.


One of the keys to sports photography is knowing the game so that you can predict where the action will occur and be ready to focus on that spot. At first this doesn't sound like a big deal; however, when you are looking through a 400 - 500 mm lens, your field of view is super narrow and you cannot see all of the action on the field. The great sports photographers have mastered keeping there non-shooting eye open and trained on the field. I haven't mastered this ninja trick yet. Instead I follow the player that I believe, based on experience, will make the play.


A team of 7-year old girls absolutely wrecks this plan because the playbook gets tossed and anarchy generally overtakes the field as soon as the ball is in play. The good thing is that they are not that fast. The best plan of attack is to follow the ball. You can guarantee that they will generally converge in a pact wherever the ball ends up.


During the game, I made one major mistake and forgot to set my camera to shutter priority. I was still in aperature priority from some shots that I took before the game. I was also set to iso 200. Instead of shooting at an action stopping 1/800 - 1/000th of a second, I fired away most of my shots at 1/180th. It wasn't apparent until I got the images into post and the motion blur was prevelant. In hindsight, I would have bumped the iso up to 400 (it was semi-cloudy/strong sun mix) and set the shutter priority to 1/1000th sec.


Luckily, I did manage some keepers although I missed some awesome shots! Next game I'll be sure to go over my checklist beforehand. If you haven't shot a sporting event, you go down to the local rec field on a weekend and take a couple hundred photos. It is excellent practice regardless of the style of photography that you prefer.

Monday, November 3, 2008

Saturday's Beach Portrait Session

Saturday afternoon I had the pleasure of photographing two very nice families down at the VB oceanfront. They were a referral from Jill Beninato over at Sit.Stay.Smile Photography. Jill specializes in pet photography and digital art; so if you have a 4-legged critter at home, you will want to stop by her site for a visit.

The families requested some journal style shots as well as the standard posed portraits, posing a big challenge in that it was a bluebird day without a cloud in the sky to diffuse the sun. In order to tame the harsh light, I used a Nikon SB-900 fired through a Softlighter II and a 7' bounce panel for additional fill. The setup was easy enough for the portraits but journal style shots would be tough. Luckily Sophie, a friend's daughter, volunteered to help out. What a life saver! I bet she never expected to be chasing kids around the beach holding an umbrella on a 8' stand. :-) Here are a few of images from the session:


Wednesday, October 29, 2008

Gabrielle and Grant - The Twins

On Sunday, I spent a couple of hours shooting photos of my friends Sarah and Richard's 4-month old twins. This was definitely a change from the haunting image I did a week ago!

Iso 200, 50mm, f/1.8, 1/750 sec

How on earth can something so small and seemingly immobile make you work that hard to keep up? As expected, most of the time one would be cranky and the other happy and then they would switch roles. Patience may just be one of the most important attributes that a photographer may possess.


Iso 200, 50mm, f/1.8, 1/750 sec

I did learn a very valuable lesson - do not use a new lens for the first time in shoot! I just purchased a Nikon 50mm f/1.8 specifically for portrait work. Sunday morning, I took a few shots with it to see the depth of field but only viewed them on my LCD and did not download them to my computer for viewing. In hindsight I should of because it would have clearly showed me just how razor thin the depth-of-field was going to be. The result is that a few of my favorite compositions found their way to the recylcle bin for being out of focus. Although I really wanted a shallow DOF, I should have opened up a bit more and shot f/2.0 - 2.5.


Iso 200, 50mm, f/1.8, 1/750 sec

I am happy with the collection of photos that were keepers. The photos were processed in Adobe Lightroom and Photoshop. A few variations in processing were thrown in including a couple cross-processed and monotones. I'm looking forward to sharing these with the clients and getting their feedback.