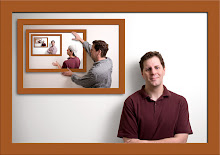
This past weekend, I dug through the closet and found an old bedsheet with a funky, colorful design to use as backdrop. The basic setup that I used was:
- Alien Bee 800 with a large softbox to camera right
- 72" silver reflector to camera left
- Vivitar 285HV aimed at the background
- Cheap Cactus wireless triggers for both strobes
- Background sheet sandwich clipped to two 8' lightstands
- Bogen tripod
- Nikon D300
- Nikon 50mm f1.8
The focus of this session was to shoot some high-keyish type photos. I decided to break the rule on not clipping highlights and just let the light overpower the shots. Afterwards, I processed the images in Adobe Lightroom and Photoshop CS3, playing with different presets, adjustments, and filters. What I came up with was something different and fun, turning a rainy gray day into a successful shoot. Here are a couple of the results.

The first is possibly one of my favorite portraits taken of me. It looked decent in color but converting it to b/w and then adding a coffee colored tint really defined the image. What I like most about this is the sharpness and catchlights in the eyes.
One question that I routinely see posted on forums is "how do set the focus to get a sharp image?" I forget where I saw this tip initially but I definitely cannot take credit for it, someone much smarter than me discovered it. Setup the shot and then remove your camera from the tripod, walk over to where you will be standing, and turn the camera back to the tripod, setting the focus on the tripod itself. Important: if you are using autofocus, turn it off now; else, when you set the camera back on the tripod and go to trip your shutter, the camera will refocus. The beauty of this is that it is simple and accurate. There is no need to guess distances, break out tape measures, or set up a "focus dummy" in your spot.
The next image was really fun. Unlike the previous one, I really wanted the colors and light to jump off of the screen. The one thing that I didn't care about was blowing the highlights. I turned up the AB800 and opened the lens to let in more than enough light. In LR, I dropped the clarity a little so that the whites gained a glow. I also increased the Black slider which added definition to the eyes. While this image probably isn't the best for me personally, I can see this effect really working great for funky portraits of kids and seniors.

The last image was a bit darker (my mood when I shot this was down a bit having been locked inside by a steady drizzle all day!) The image was quite what I was initially after but it did get its origin from a night when I was sitting on the catch watching a late night movie. Just outside of my living room is a neighborhood light that was was casting these cool shadows through my french door. My initial thought was to shoot it with just the existing light streaming in, casting the soft shadow across my face. I wanted a cool white balance andmaybe even a conversion in LR to a blue monochrome finish for a colder yet romantic feel. That was the plan. Here's what really happened.....
Somewhere along the line I thought that I could "help" the ambient along by placing a single wireless 285HV outside to camera left, aimed back through the French door. My initial test shots showed that even at the lowest setting, the light was being thrown much harder than the lightpost. The more I looked at it, the more I was intrigued with what I was getting. The mood of the shot changed entirely. I grabbed the 72" silver reflector to add a bit of fill to camera right.

In LR, I converted the image to b/w and used the exposure brush to selectively darken/lighten a few spots. I then added a heavy vignette. The image isn't one that I would use for an everyday portrait but it was fun creating something with a darker feel.
Self portraits are great as creative outlets and for general practice. If the results are a disaster, you simply delete and no one is the wiser; however, if you hit on something that you really like, it can be a great addition to your next client shoot.


