Tuesday, November 24, 2009

A Not So Beach Day...

Following Sara's shoot at the Cavalier (see previous post), we grabbed a cup of coffee... well, hot chocolate for me and then hustled up to 85th street to do some Christmas card portraits of Noelle's and Holly's kids. The breezy conditions felt like a full blow gale rolling across the open beach and the temp must have dropped another 10 degrees in the short time between shoots. I have to hand it to the kids though, they hung in there just long enough for some nice images.


Sara

If you recall from earlier posts, Sara has had me over to photograph her twin babies as well as doing a family portrait. For Christmas, her husband requested some individual portraits of her so on Saturday we set off to the old Cavalier Hotel to gab a few. It was not without it's trial - stiff wind, cold air, and hotel security which eventually, though politely, ran us off the property. I love this venue but next time I'll definitely be requesting permission in advance! Anyway, here are few that we managed before being asked to leave...


Jamie and Joe

Last year I met Jamie while playing on a kickball team in Va Beach (I know I'm still a kid at heart!) and a month ago she emailed me about shooting her and her fiance Joe's wedding in May. They will be getting married in the Outer Banks on the beach which should post challenges of its own. Jamie asked if I wouldn't mind shooting their portrait seeing that they had no photos of the two them together and I thought it would be a great idea.


Turns out that the only day we had available was the weekend following one of the worst Nor'easters that the beach had seen. The weatherman advised that Saturday afternoon should be clearing so we pushed forward with our plans. I scrapped the beach location and ask my friend Sara if she wouldn't mind us using her house instead. At 3:00, the clearing was all but non-existent with heavy gray skies and cold drizzly mist. Not the optimum conditions for a shoot; however, we made the best of it.


Jamie and Joe were probably the easiest couple that I have had the pleasure of photographing and they were definitely troopers for putting up with the conditions. For those interested in the setup, I had my assistant holding a Nikon SB-900 with a 42" shoot-thru umbrella attached to a monopod.

Considering the conditions, I was pleased with the outcome.

Friday, July 17, 2009

I don't know exactly when Park's Ave Apartments & Rooms were built but I understand from my parents that they think that they were there in the '30s. About 20-years ago, Virginia Beach began a revitalization program for the oceanfront after tourism dropped due to the decline in property maintenance. The Park Avenue row houses became a rundown, poverty ridden spot situated between a new modern-design convention center, new firehouse, and several upscale restaurants. In some of the photos you will see that they are backed by new bank buildings.

I thought the apartments would have been destroyed years ago but it wasn't until this past weekend that I noticed that they had been foreclosed and boarded up. There is little history to be found on them scouring the net, but I plan on finding out a bit more. I'd love to know the stories of the people that passed through there.


The images were captured midday and luckily the hazy, overcast sky provided some diffusion to soften the shadows a bit. Each image is utilized high-dynamic range photography techniques, combining 5-images into a single frame. Typically I like my HDR shots to lean more toward the natural end of the spectrum but in this case, I liked how pushing the HDR processing added to the feeling of decay for these images.


As mentioned in previous post on HDR, my favorite tool of choice HDRSoft's Photomatix. Photoshop CS3 does a fairly decent job with HDR and there are a plethora of new applications out that work well, but Photomatix has been a leader in HDR processing applications for some time and for good reason - it is fairly intuitive to use and produces incredible results.


The key thing to remember when using Photomatix, or any other HDR tool for that matter, is that the image itself is not complete when you are done processing it in the application. In truth, you have to fight the temptation to attempt to perfect it in the tool because your ultimate results will be lackluster. The HDR tool is just one step in the post-processing. You still need to bring the image back into you image editor (Lightroom, Photoshop, Elements, etc.) to put the final touches and sharpening on it. In a future shoot, I will walk through my detailed workflow for a HDR image.

Have a safe and enjoyable weekend!

Too Long Gone

I can't believe how far behind that I fell on my blog - my last post was just after the Shamrock half-marathon in in March! Just because I have not been writing, it doesn't mean that my life and photography have come to a complete standstill. Actually the opposite has happened!

Since the Shamrock, I've become a mentor with the Leukemia and Lymphoma Society's Team-in-Training to assist a new group of half-marathoners with raising donations to help find a cure for blood cancer while training for the Rock-n-Roll hal-marathon on Labor Day Weekend. I also moved into a new role in my day job that has required a great deal of weekly travel. The result is that I have not had as much time to devote to my fine art photography; however, I have been maintaining a steady stream of portraits.

In the next couple of days, I will be introducing two shoots that were done for the families of Jenny Gadams and Shannon Tipton as well as photo study that I did on the foreclosed Park Place Apartments. This weekend I'm scheduled for a shoot with the Ellenbeckers. Until the next entry, thank you for checking back and I look forward to hearing from you soon.

Monday, March 23, 2009

TNT LLS Recap

The sun was just beginning to cast it's first light over the horizon as the gun sounded, sending 7000 runners on 13.1 mile journey around the north of Virginia Beach. The 35-degree morning was the culmination of a much longer journey that we have taken over the last several months. Back in October, I first approached you requesting your assistance with raising $1900 for the Leukemia and Lymphoma Society. In exchange, I was going to run the Shamrock half-marathon. Since that time, I was amazed at the outpouring of generosity and support that was given. Contributions came from friends and family, people that only knew me as an avatar on a message forum, and six little girls that took it upon themselves to go door-to-door with a decorated red wagon to collect $150 for a cause to help rid us of a disease that kills thousands. As I took the starting line yesterday, my purple jersey representing Team-in-Training was adorned with the names of those that while no longer with us, are are clearly present in our memories. I was humbled by the knowledge our team far exceeded our goal and raised $2568! Overall for the Shamrock, 125 TNT runners/walkers raised over $170,000, the second largest amount for a VA Beach event!

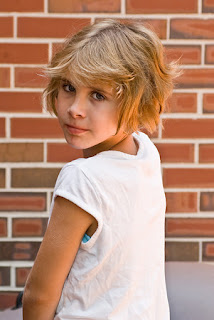
My nieces and biggest supporters - Savannah and Megan

Honestly, I thought that I had the easy part of the deal as all I had to do was my normal training and then show up for the race. I didn't expect to have any setbacks. For those that have been following my training journal, you already know that back in November I suffered both a lower back and ankle injury that landed me in physical therapy 3-days a week for the month of December into January. Even though I was getting some cardio workouts in, I was getting nervous that I was loosing a lot of ground. I owe it to words of encouragement from my training partners Bev, Alissa, Jess, Angela, Michelle, and Liz for helping me maintain a positive attitude and to Coach Bob, Steve, Michelle, Danielle, and the rest of the TNT coaches and mentors for reminding me of the reason for the goal. Shannon kept me moving forward with her pep talks and never say die attitude. By February, I was rejoining the team for the long runs through First Landing Park during 18-degree mornings and feeling great.

Meeting my family post-race

Then 3-weeks before the race, I started having IT Band issues where the muscle/tendon that runs the outside of your leg begins rubbing the bone in your knee, becoming inflamed. At first it stats as a dull ache around 3-miles and then grows steadily worse. I took a week off to rest and releive the aggravation. 2-weeks before the race I set out on a Saturday morning run and it felt great until the 10-mile mark at which point a sharp pain shot through the knee and virtually brought me to the ground. That Tuesday I saw a sports specialist who took x-rays and referred me for an MRI to rule out a torn miniscus or ACL. The test came back negative and it was confirmed as ITBS. It generally takes 5-weeks of rest and stretching to get over it; however, the race was just 5-days away. I scheduled 3-days with the physical therapist where for 2-hours a day, we did some extreme stretching and massage therapy. It loosened some knots above the knee but the night before the race, it was still tender to walk on.

As the race began, I left the line with my teammate Alissa and her friend Indra. Within the first half-mile, a sharp pain ran up my shin and through the right side of my knee. When I grimaced, Alissa said it may be better if I stop; however if I didn't stop now, she wasn't going to let me until the end of the race. The doctor had told me that it would be painful but no permanent damage would be done. The thought of all of you behind me and of those that suffer pain everyday due to LLS from which they simply can't walk away made my mind up that I was going to continue forward. The pain never subsided, occassionally surging worse before normalizing; however, for 12.1 miles Alissa kept giving me encouragement and pushed me further along the path. At the halfway mark I was shocked to find that we were running sub 10-minute miles. I owe her a lot of thanks for being a great teammate and friend. 1-mile from the finish, the pain sharpened to where I couldn't land on my right foot. I told Alissa to go ahead without me while I walked for 20-seconds waiting for the pain to subside before starting back to a jog. Just as I was thinking that it may beat me, I ran into my niece Savannah and my mom at the half-mile mark. A big hug from each was all it took for me to push through to the finish line. I looked at my watch and was ecstatic to see that even with the injury, I managed a 2 hour 17 minute half marathon. Just 7-months ago, it took me 2 hours 53 minutes to finish the Rock-N-Roll. I can only think that had I been healthy, I would have been much closer to the 2-hour mark, a goal for the next race.

My sister Bec and me

Thing is that it really wasn't about the time or about me. It was about finishing - finishing the training, the fundraising, the race, and one day, hopefully soon, finishing the search for a cure for all of the blood cancers. It will be a beautiful day when a pill or a vaccination can cure lymphoma and leukemia. We the day comes that we can refer to these diseases with little more relevance than a common cold, you will be the ones thanked for finding the cure. Your efforts have already made incredible achievements in this battle with many more men, women, and children being able to live their lives out pain free of the disease. In the coming years, I hope that TNT has to search for a new cause to support because this one no longer exists.

If you recall at the start, I promised to give away either a portrait session or a fine art print to one of the contributers selected in a drawing. Drumroll please....... the lucky winner is MARSHA RUTHERFORD. If you would like a print, please choose an image from http://owney.smugmug.com/Fine%20Art . Depending on the actual dimensions of the print, you will received either a 8x20, 16x20, or 12x18. Just email with your selection. Congratulations!!!!!!!

Thank you to everyone that has made this adventure as fun, exciting, and heartwarming as it was challenging. The TNT team is a wondeful organization and I encourage everyone to look into joining them for an event. Whether you are a runner, biker, swimmer, or walker; looking to set a new record or simply trying to find a healthy way to get in shape, you can benefit from the best coaches, mentors, and support staff while raising money to do some good in this world. The motivational dinner the night before the race is alone enough to make it worthwhile. I appreciate all the support over the last several months and I wish you the best for the rest of 2009.
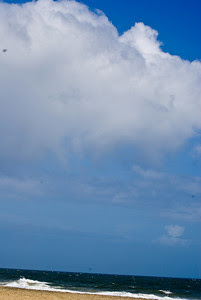
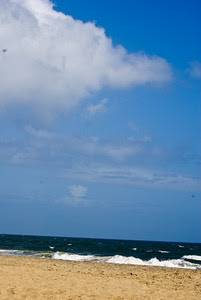
Wednesday, March 11, 2009

Shaun, Christine, and Shaemus

Saturday was the first truly beautiful day of 2009 with the temp reaching the upper 70's. Shaun and Christine have been trying to arrange a family photo shoot for a couple of months but it seems that every time we made an attempt, the weather was horrible or someone had to go out of town. Well I was excited when Christine pinged me on Friday and asked if I was available for Saturday afternoon. Shaemus' birthday is this week and they really wanted some portraits before he turned 1.


I planned to shoot at 3 different locations that I had checked previously and knew would make for some great images. What I didn't plan on was that it being the first gorgeous day this year, everyone would be out at the oceanfront and my planned locations would be completely overran. The first stop was the VA Beach Fishing Center where my friend Jill over at Sit.Stay.Smile Photography did some awesome images a few weeks ago. There are two pastel colored sheds there that would make for awesome backdrops; however, when I arrived the parking lot was completely full and the sheds were blocked by several trucks. I scratched plans to do anything at the south end of the beach, called Shaun and Chris, and told them to meet me up at 84th street.


While temps were close to 80 degrees inland, on the beach they were running in the low 60's due to the wind whipping off of the 45-degree ocean. Just one block over you could be comfortable in shorts but right on the ocean, it was very chilly. I have to hand it to Shaun, Christine, and Shaemus as well as Chad (Shaun's brother) and his girlfriend Megan who came out to assist for hanging in there for awhile.


The other challenge was the timing. I didn't plan to get to the north end until later in the day just as the sun was dropping and we had that beautiful golden light. Instead we were there at 4:00 with the sun absolutely blazing, posing serious issues with the hard light and deep shadows. The single photos of Shaemus were shot under a canopy of trees covering the walkway to the ocean. Fill light came from the side of a white house about 200 feet to camera left. To offset the sun on the beach, I had a bigger challenge. I used an off-camera strobe opposite the sun to knockdown the sun light. Neither the 285HV or the Nikon-900 had enough power shooting thru a softliter to really overpower the sun, but they did enable me to balance the light for some decent exposures and to pull some color from the sky.

The photos were imported into Adobe Lightroom were they were cataloged, rated, received inital processing. They were then taken into Adobe Photoshop CS3 for additional tweaks as needed.


This was a very fun shoot and even with the challenges, some excellent images came out of it. I can't wait to work with them again in the near future!

Tuesday, February 24, 2009

Playing with Self Portraits

So what do you do when you can't find someone to model for you, it is too nasty out to go searching for an image, and you've been suffering from a lack of creativity? Try shooting some self portraits. Seriously, I'm not kidding. SPs are a good way to practice your portrait lighting and allow you to experiment on shots without worrying about ruining a client's session.


This past weekend, I dug through the closet and found an old bedsheet with a funky, colorful design to use as backdrop. The basic setup that I used was:


- Alien Bee 800 with a large softbox to camera right
- 72" silver reflector to camera left
- Vivitar 285HV aimed at the background
- Cheap Cactus wireless triggers for both strobes
- Background sheet sandwich clipped to two 8' lightstands
- Bogen tripod
- Nikon D300
- Nikon 50mm f1.8


The focus of this session was to shoot some high-keyish type photos. I decided to break the rule on not clipping highlights and just let the light overpower the shots. Afterwards, I processed the images in Adobe Lightroom and Photoshop CS3, playing with different presets, adjustments, and filters. What I came up with was something different and fun, turning a rainy gray day into a successful shoot. Here are a couple of the results.


The first is possibly one of my favorite portraits taken of me. It looked decent in color but converting it to b/w and then adding a coffee colored tint really defined the image. What I like most about this is the sharpness and catchlights in the eyes.


One question that I routinely see posted on forums is "how do set the focus to get a sharp image?" I forget where I saw this tip initially but I definitely cannot take credit for it, someone much smarter than me discovered it. Setup the shot and then remove your camera from the tripod, walk over to where you will be standing, and turn the camera back to the tripod, setting the focus on the tripod itself. Important: if you are using autofocus, turn it off now; else, when you set the camera back on the tripod and go to trip your shutter, the camera will refocus. The beauty of this is that it is simple and accurate. There is no need to guess distances, break out tape measures, or set up a "focus dummy" in your spot.


The next image was really fun. Unlike the previous one, I really wanted the colors and light to jump off of the screen. The one thing that I didn't care about was blowing the highlights. I turned up the AB800 and opened the lens to let in more than enough light. In LR, I dropped the clarity a little so that the whites gained a glow. I also increased the Black slider which added definition to the eyes. While this image probably isn't the best for me personally, I can see this effect really working great for funky portraits of kids and seniors.


The last image was a bit darker (my mood when I shot this was down a bit having been locked inside by a steady drizzle all day!) The image was quite what I was initially after but it did get its origin from a night when I was sitting on the catch watching a late night movie. Just outside of my living room is a neighborhood light that was was casting these cool shadows through my french door. My initial thought was to shoot it with just the existing light streaming in, casting the soft shadow across my face. I wanted a cool white balance andmaybe even a conversion in LR to a blue monochrome finish for a colder yet romantic feel. That was the plan. Here's what really happened.....


Somewhere along the line I thought that I could "help" the ambient along by placing a single wireless 285HV outside to camera left, aimed back through the French door. My initial test shots showed that even at the lowest setting, the light was being thrown much harder than the lightpost. The more I looked at it, the more I was intrigued with what I was getting. The mood of the shot changed entirely. I grabbed the 72" silver reflector to add a bit of fill to camera right.


In LR, I converted the image to b/w and used the exposure brush to selectively darken/lighten a few spots. I then added a heavy vignette. The image isn't one that I would use for an everyday portrait but it was fun creating something with a darker feel.

Self portraits are great as creative outlets and for general practice. If the results are a disaster, you simply delete and no one is the wiser; however, if you hit on something that you really like, it can be a great addition to your next client shoot.

Wednesday, February 18, 2009

Feathered Friend

Okay, this image was a year in the making. I have a lake behind my townhouse which draws a plethora of avian life. During the spring, summer, and fall; there are everything red-winged black birds to an amazing white bar owl that I stumbled across one evening. During the winter months, the list of available species narrows but you can regularly find white egrets and blue herons just along the shore.

Over the last year, I have occasionally ventured down to try to capture an image of these great birds. There are a few photographers on DGrin that routinely post gorgeous bird images. They make it look amazingly easy, which is somewhat deceiving seeing that birds are one of the most difficult subjects to photograph. Each time I returned from a shoot, I was disappointed with the captures.


Iso 200, f/6.3, 1/500 sec, 500mm

On Sunday morning, I walked down tot he water's edge to find two herons perched on the opposite shore, one far too out of range and the other just barely in range. I ran back to my place, loaded the Nikon D300 with the Sigma 50 - 500mm, grabbed the monopod, and headed back down to the water. I managed to get 2 shots before the great bird took to the air and left the scene. Of course when he took off, I was looking at the histogram on the LCD to determine I was clipping the highlights and managed to miss the great "take flight" shot. I'll save that for next time as I'm happy with how this image turned out.

Wednesday, January 28, 2009

The Creation of Ariel

I recently received a request on DGrin for information on how I created an image of an angel. Btw, the angel is my niece Savannah and she truly is an angel! The Ariel image was created for the LPS Challenge: Sin or Virtue last year. Here is the final....


When I envisioned it originally, I planned to purchase or rent wings from a theatrical store for my niece Savannah to wear. Well I couldn't find any for rent and to purchase a set online, it was going to cost at a minimum $600, which was way more than I was willing to splurge for a contest. Next I investigated making a set of wings only to find that Michael's had 3 feathers for $5, another small fortune. I decided to take a different tact and employ some editing skills. The key was that all of the images had to be taken that weekend so I didn't have a lot of time to set up perfect shots.

Element 1: Stormy Beach
This part was going to be easy. It just so happened that their was tropical storm passing by Virginia Beach that weekend. As usual, though, it was not as easy as planned! When I got to Sandbridge Beach, I opened my bag to find that condensation had formed inside of my 18 - 200mm lens (I was using Sony at the time). The only other lens I had was a 70 - 300mm, leaving me the choice of either giving up on the landscape or set the lens to 70mm and shoot a panaroma. To get enough usable field for the depth I wanted, I set the camera in portrait orientation and took 8 frames.. 4 top and 4 bottom. Here are a few to get the idea....

Frame 1:

Frame 2:

When I got home, I stitched these using PS CS3 and trimmed the panaroma into a 2:5 ratio to get the following image.
As you can see, the tropical storm was a bit of a disappointment as the the clouds never formed into the dark, nasty formations that you expect from a storm like that. To fix it, I created a black and white layer above the color base. I then added multiple curves adjustment layers and gradient masks to enhance the contrast of the sky and beach separately. The next step was to copy the original background layer to the top of the stack, set its blend mode to "Color" and then drop the opacity until I got the tone that I needed.


Element 2: The Model
Due to time constraints, I wasn't able to take Savannah to the beach for the shot. I had to settle for getting a shot of her at her house on my way home from the beach. Now this is possibly one of the worst portraits -- I take that back -- this is not even a portrait by anyone's standards. It is a 5-second snapshot in bad light with a horrible background.


In PS CS3, I extracted Savannah from the background. It was a fairly frustrating extraction due to the mortar in the bricks matching her hair. This was probably the most pain staking part but when I was done, the patio was gone.

Element 3: Wings
This part was fun. I grabbed my camera and headed down the local marina and hung out by the fish cleaning station for a bit. Before long, a group of fishermen showed with a nice catch and began carving away. Within seconds, there was no less than 50 seagulls hovering around picking off scraps. I must have shot 200 images and I'm not sure if this is the exact one I settled on but it was close...


Element 4: An Angel is Born
In PS CS3, I opened the image of Savannah and the seagull photo. Using the Move Tool, I dragged the wings image onto the Savannah image, creating 2 layers with the wings on top. Selecting the Wings layer, I dropped the opacity to 50% so that I could see Savannah beneath them. I selected Edit>Transform and rotated the wings so that they were pointing more vertical and moved them so that they lined up with Savannah's body. I also tweaked the image size to make the wings "fit".


Once I had the wings in the location that I wanted, the next step was to create a mask on the wings layer and begin painting out the portions of seagull and that I did not want. Paint on the mask with black to hide the unwanted elements and let the background show thru. I then raised the wings layer's opacity back to 100% and I had the rough angel image that I needed.

As you can see, the image is really rough (Also pretend that the white background is really transparent). I used the Healing Brush to smooth out the intersection of feathers to Savannah's body as well as hide her arm by adding feathers. I also cleaned up the mask a bit more to hide the extraneous stuff I missed the first time around.

The final adjustment to the Angel was to desaturate her facial color. If you recall from above, her portrait was taken with hard sunlight bounced off of a brick wall and her face picked up a lot of red. I lowered the saturation and selectively brought back color to the eyes and mouth by masking the Saturation Adjustment layer. I added some surface blur to her face as well to give her that soft powdery appearance.

The last step in the process was to drag the Angel layers into the Beach image and make some final healing and color adjustments to each element to get them to blend seamlessly while adjusting a final curves layer to add depth.

I wrote this from memory of something that I did a year ago so I probably missed a few things but I think you will get the general gist. The key is envisioning your target image and then seeing how different components can be molded to fit. On their own, each of these photos were less than good; however, bringing them together created something kind of magical. I wish I was this creative all of the time.

Friday, January 2, 2009

Welcome 2009

I wish you a happy and prosperous 2009! May you find strength in the love of friends and family, enlightenment through your creative pursuits, prosperity in your ventures, laughter in each day, humility in your charity, and peace in all you do.


Happy New Year!!!